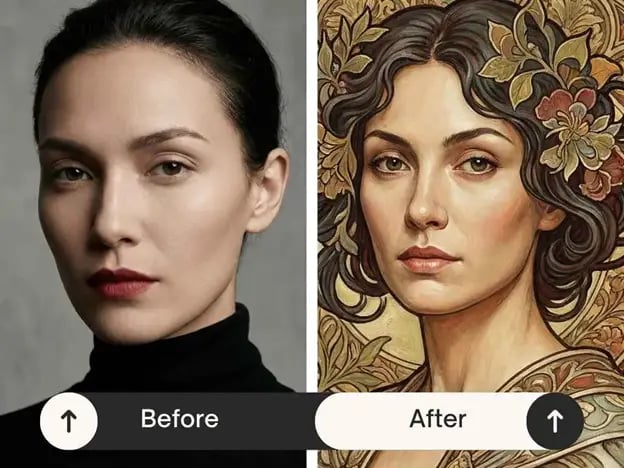
You can create stunning visuals without being a professional designer. Many people struggle to make their photos look polished because traditional software is too difficult to learn. Using an ai photo editor for free allows you to skip the long learning curve and get straight to the creative part of the process. These tools use smart technology to understand what is in your picture and how to make it look better with just a few clicks.
If you want to transform an existing picture into something completely new, you should try an image to image ai free online to see what is possible. This specific technology takes your original file and uses it as a template for a new creation. You can change the art style, the lighting, or even the entire setting while keeping the basic shape of your subject. It is a great way to experiment with different looks without starting from scratch every time.
Step-by-Step Guide to Better AI Results
Getting the best out of these tools requires a bit of strategy. You cannot just click a button and expect perfection every time. You need to understand how to guide the software to get the look you want. Follow these steps to improve your output and create images that look like they were made by a pro.
Step 1: Choose a Clear Source Image
The quality of your final result depends heavily on what you give the AI at the start. If you upload a blurry or dark photo, the software will have a hard time identifying the edges and details. Pick a photo with good lighting and a clear subject. If you are using a tool to edit a portrait, make sure the face is clearly visible and not covered by heavy shadows.
Step 2: Write a Simple and Clear Prompt
The prompt is the set of instructions you give to the AI. You do not need to use complex language or technical terms. Instead, use strong nouns and adjectives to describe what you want to see. If you want a sunny park, write sunny park with green grass and blue sky. Avoid using too many words that do not add visual value. The AI works best when it has a clear direction to follow.
Step 3: Adjust the Influence Settings
Most tools have a slider that controls how much the AI changes the original image. This is often called strength or influence. If you set it too low, you will barely see any change. If you set it too high, the AI might ignore your original photo completely and create something totally different. Start in the middle, usually around 50 percent, and move the slider up or down based on the results you see.
Step 4: Select the Right Style
Many platforms offer preset styles like cinematic, 3D render, or oil painting. Choosing a style helps the AI narrow down the textures and colors it should use. If you are looking for a realistic photo, select a photography style. If you want something for a blog or a social media post, a vibrant or artistic style might work better. Matching the style to your goal is a key part of the process.
Conclusion
Mastering these tools is all about practice and patience. You can use an AI photo editor for free to fix minor issues or completely change the look of your favorite pictures. By following a structured process and avoiding common pitfalls, you will find that creating professional visuals is much easier than it used to be.
Copyright © 2026 California Business Journal. All Rights Reserved.
For California Business Journal Disclaimers, go to /terms-conditions/.


